Internal LDAP Server
Warning
You must always remember to remove test accounts, as shown below, when running a Hoss server that is exposed to the public internet. If you fail to do this, anyone will be able to access the server.
Using the internal LDAP server is optional, and enabled by default, as it is used during development and testing. When enabled, the system will “work out of the box”. There is a simple UI to manage the LDAP server, accessible only to administrators with access to the host machine.
Accessing Admin UI
The LDAP administrator UI is only served locally on port 6443 and must be accessed from the host. Typically this
can be done via SSH + port forwarding. For example:
$ ssh -i ~/.ssh/mykey.pem -L 6443:localhost:6443 username@hoss.my-server.com
After this command, visit https://localhost:6443 in your browser. You will get a warning due to self-signed
certificates that is OK to accept. Once the page loads, you will see the “phpLDAPadmin” page. Click on the “login”
link on the left side of the page.
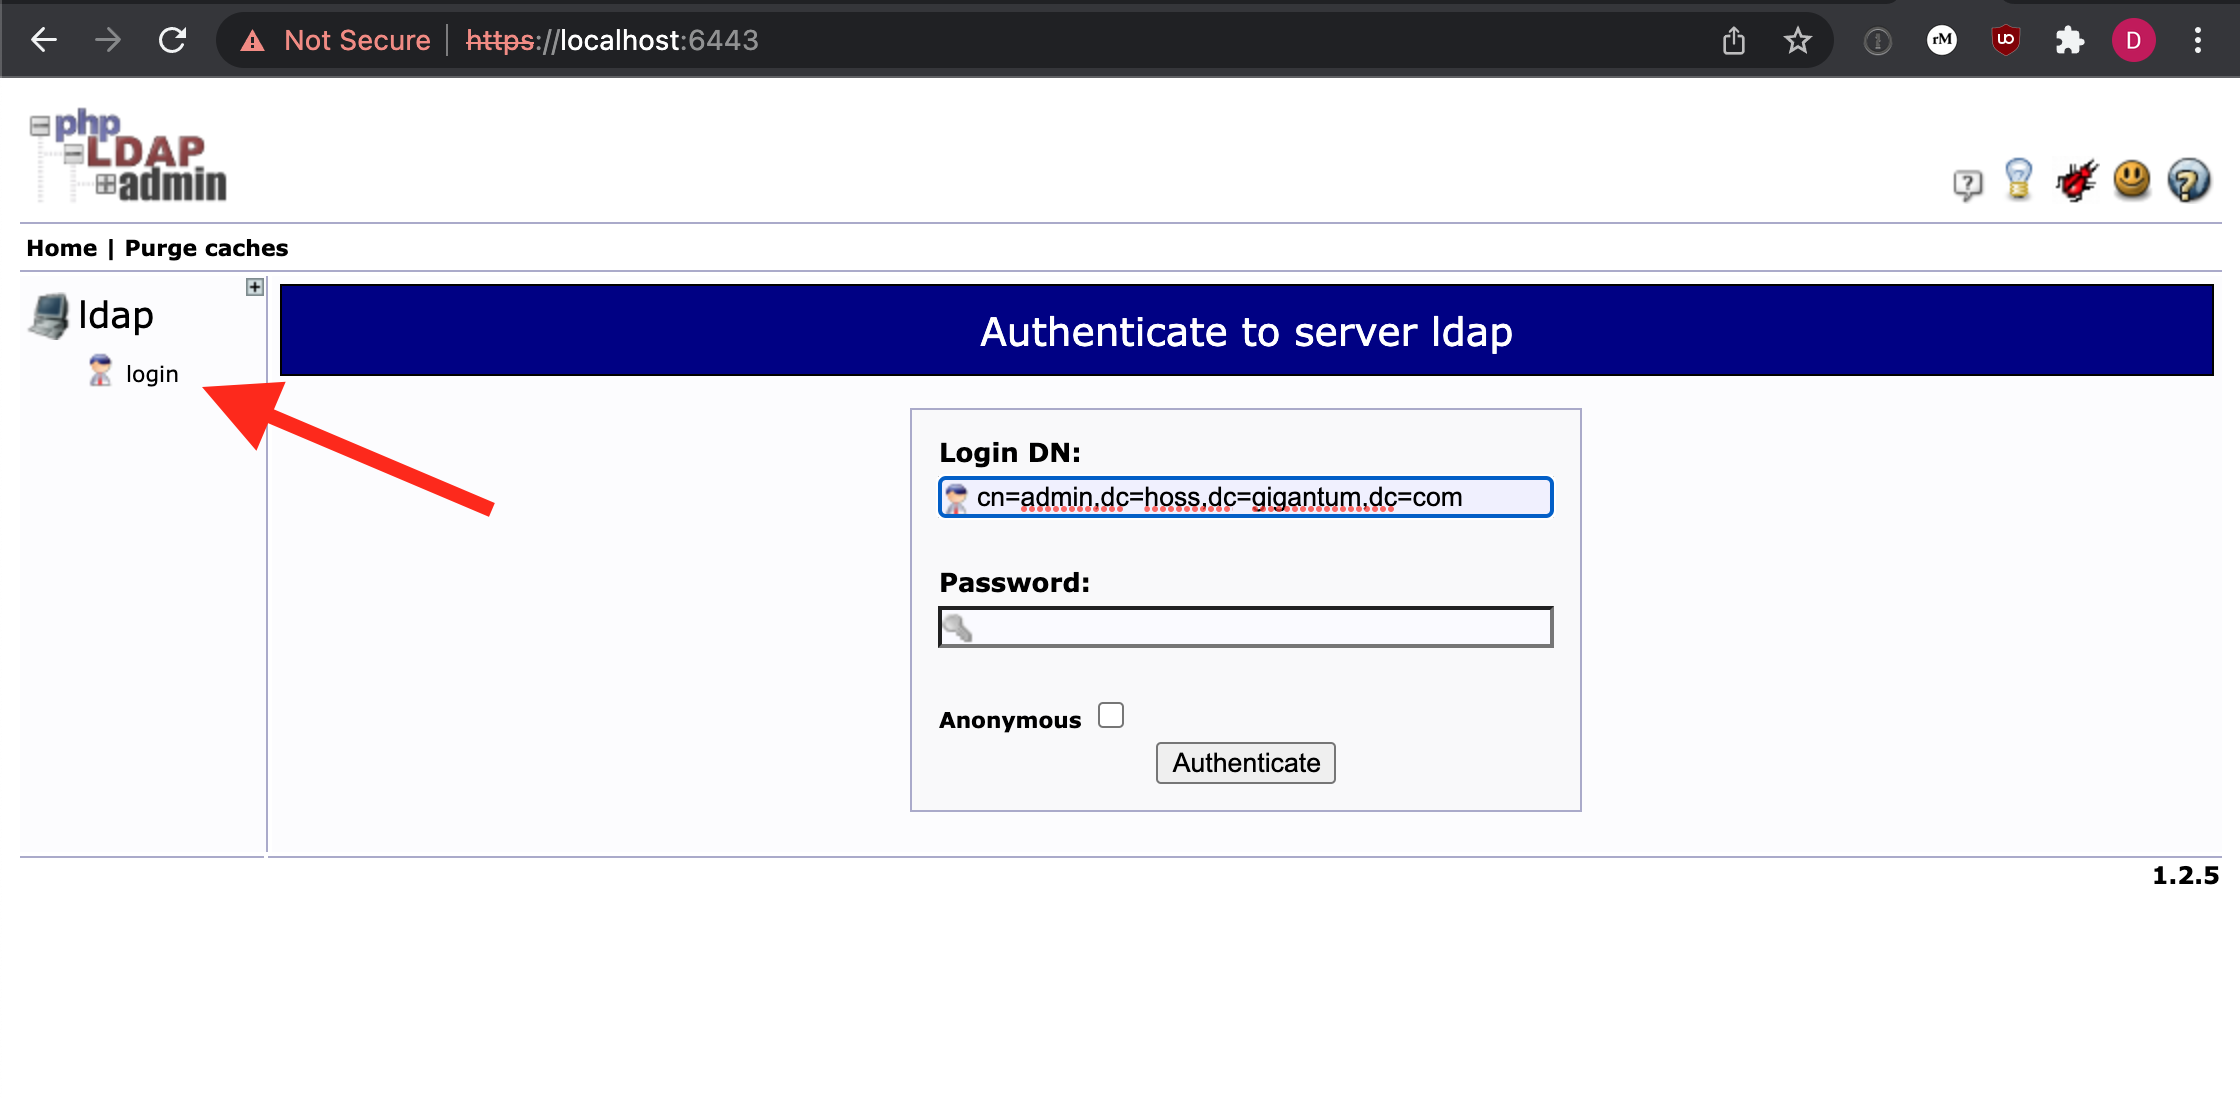
The username should already be defaulted to the correct value for your server. For example, by default it will be
cn=admin,dc=hoss,dc=gigantum,dc=com where the LDAP_DOMAIN in ~/.hoss/.env is hoss.gigantum.com.
The password is available in the ~/.hoss/.env file as LDAP_ADMIN_PASSWORD.
Removing Users
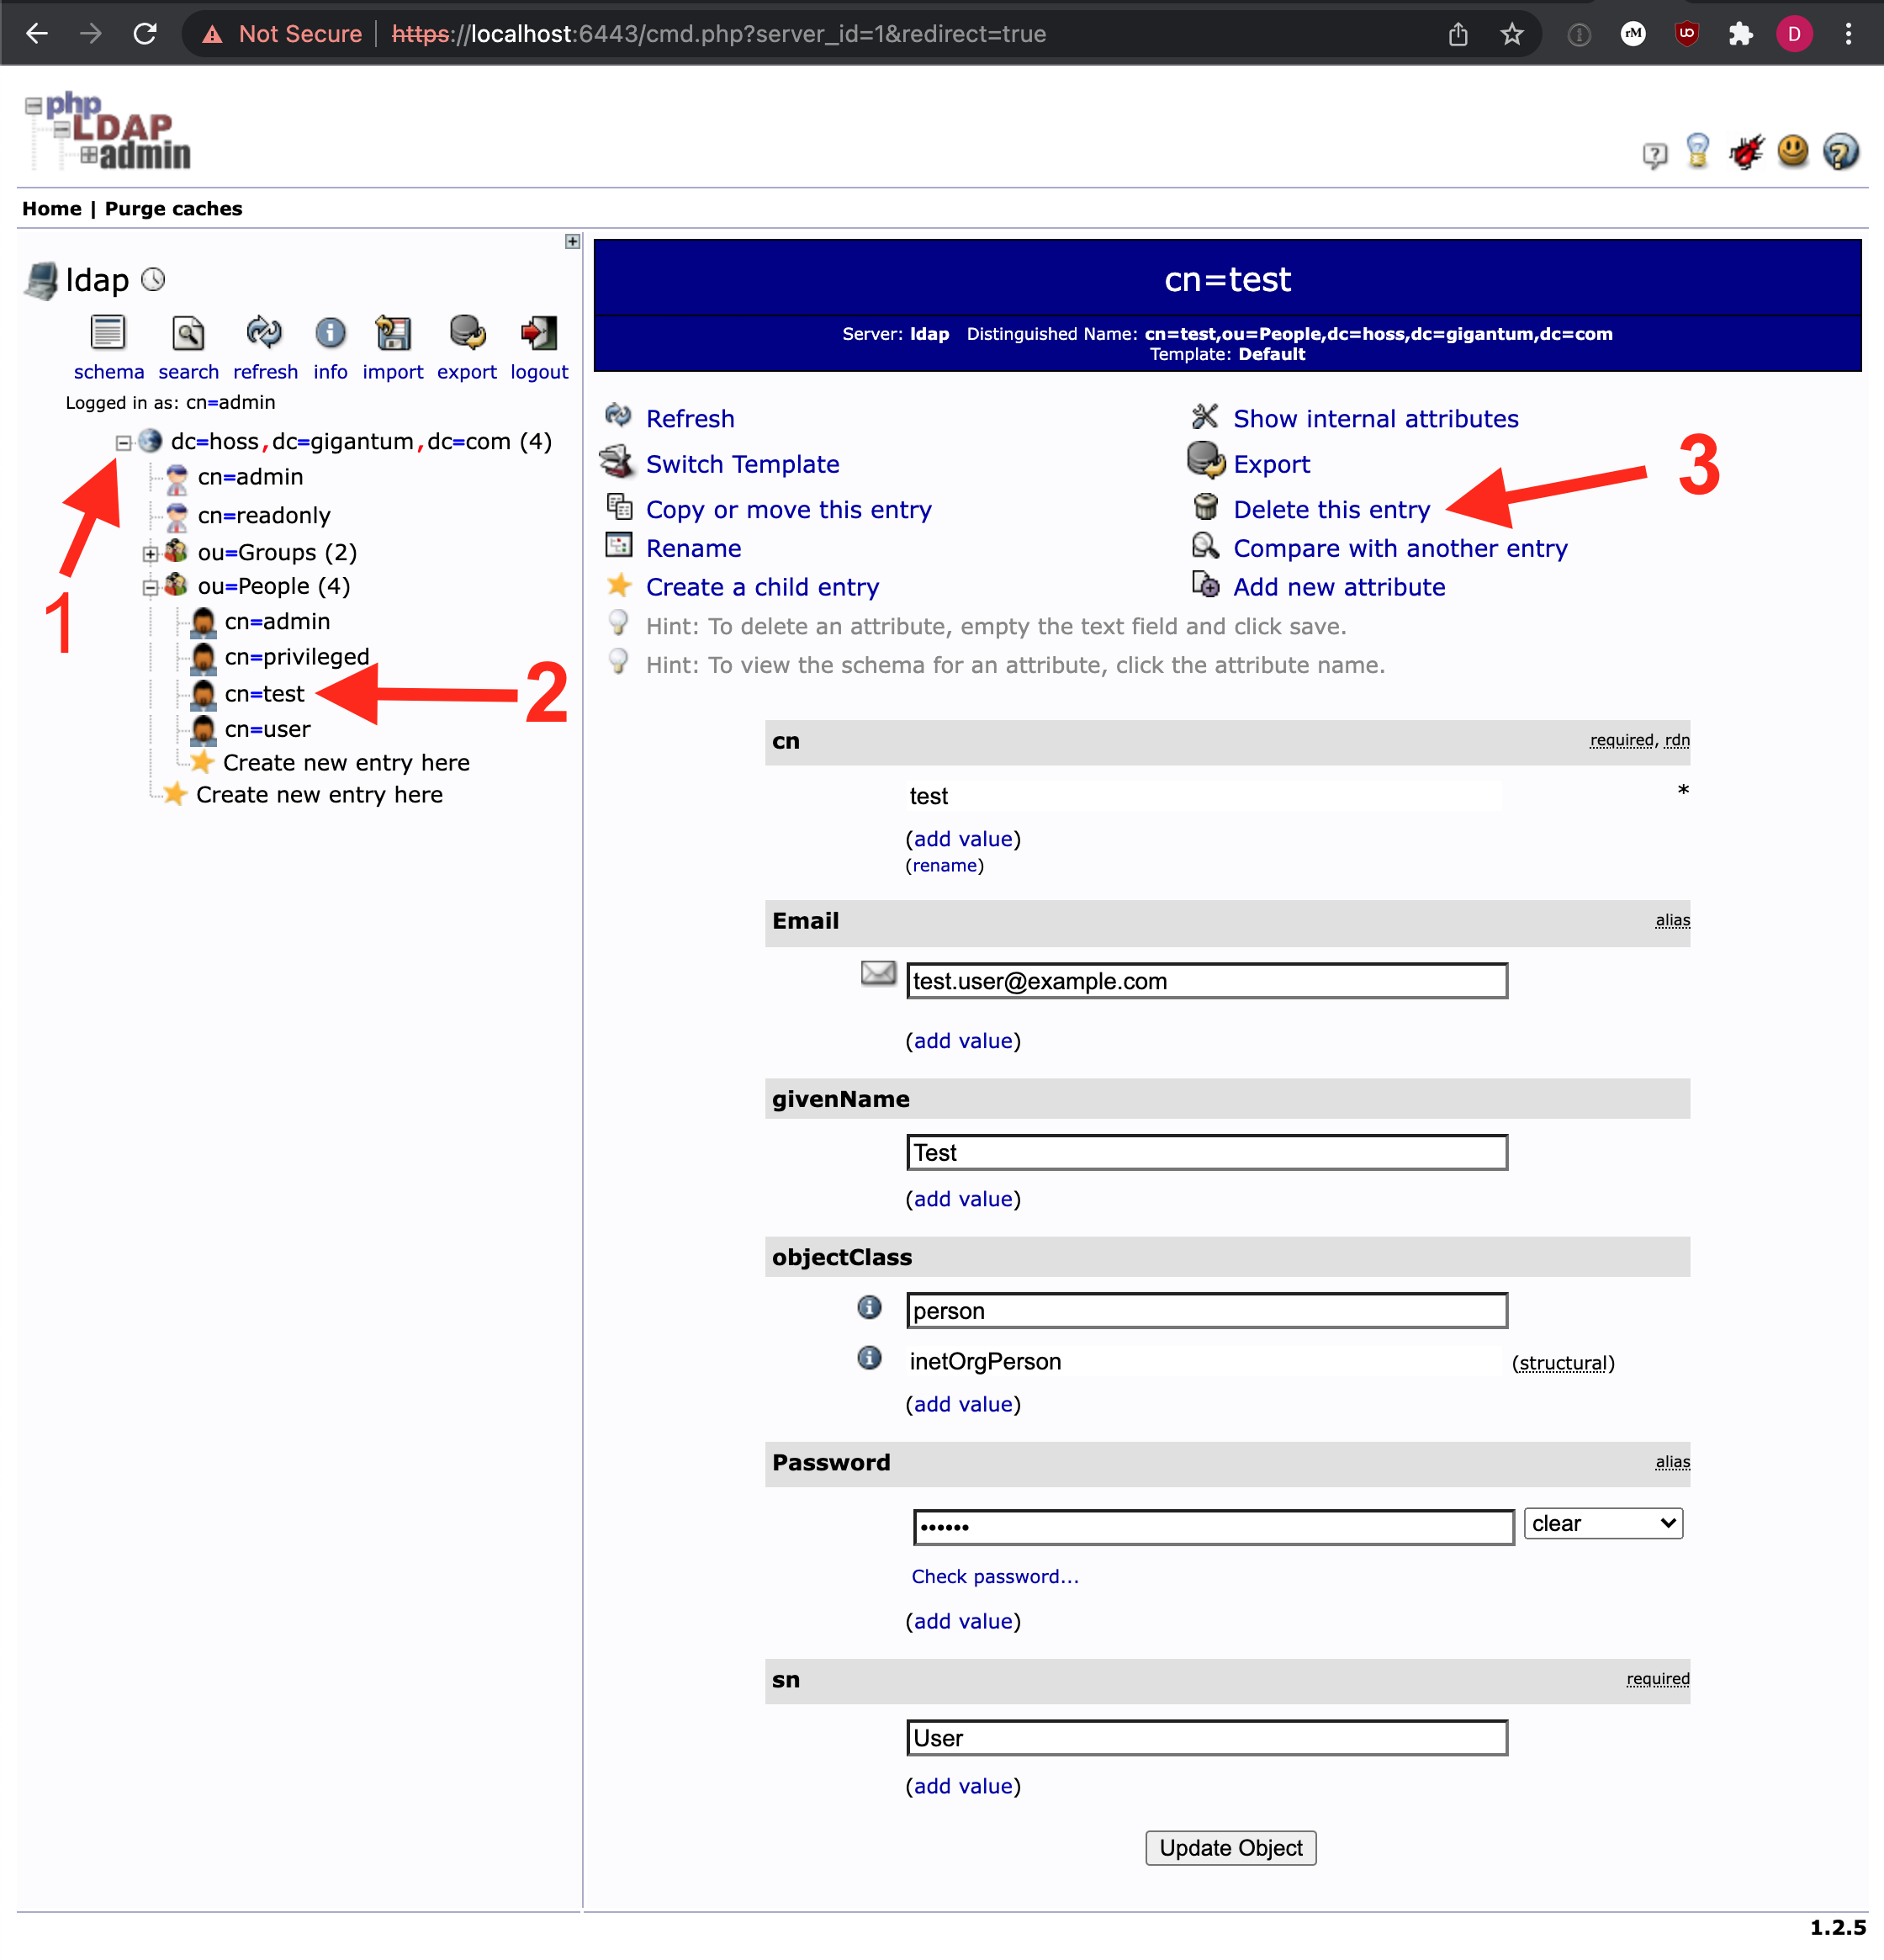
To remove a user, delete the record for the user from the server.
Expand the items on the left to reveal “ou=People”.
Select the desired user (usernames will be visible)
Select “Delete this entry”
Select “Delete” to confirm
Adding Users
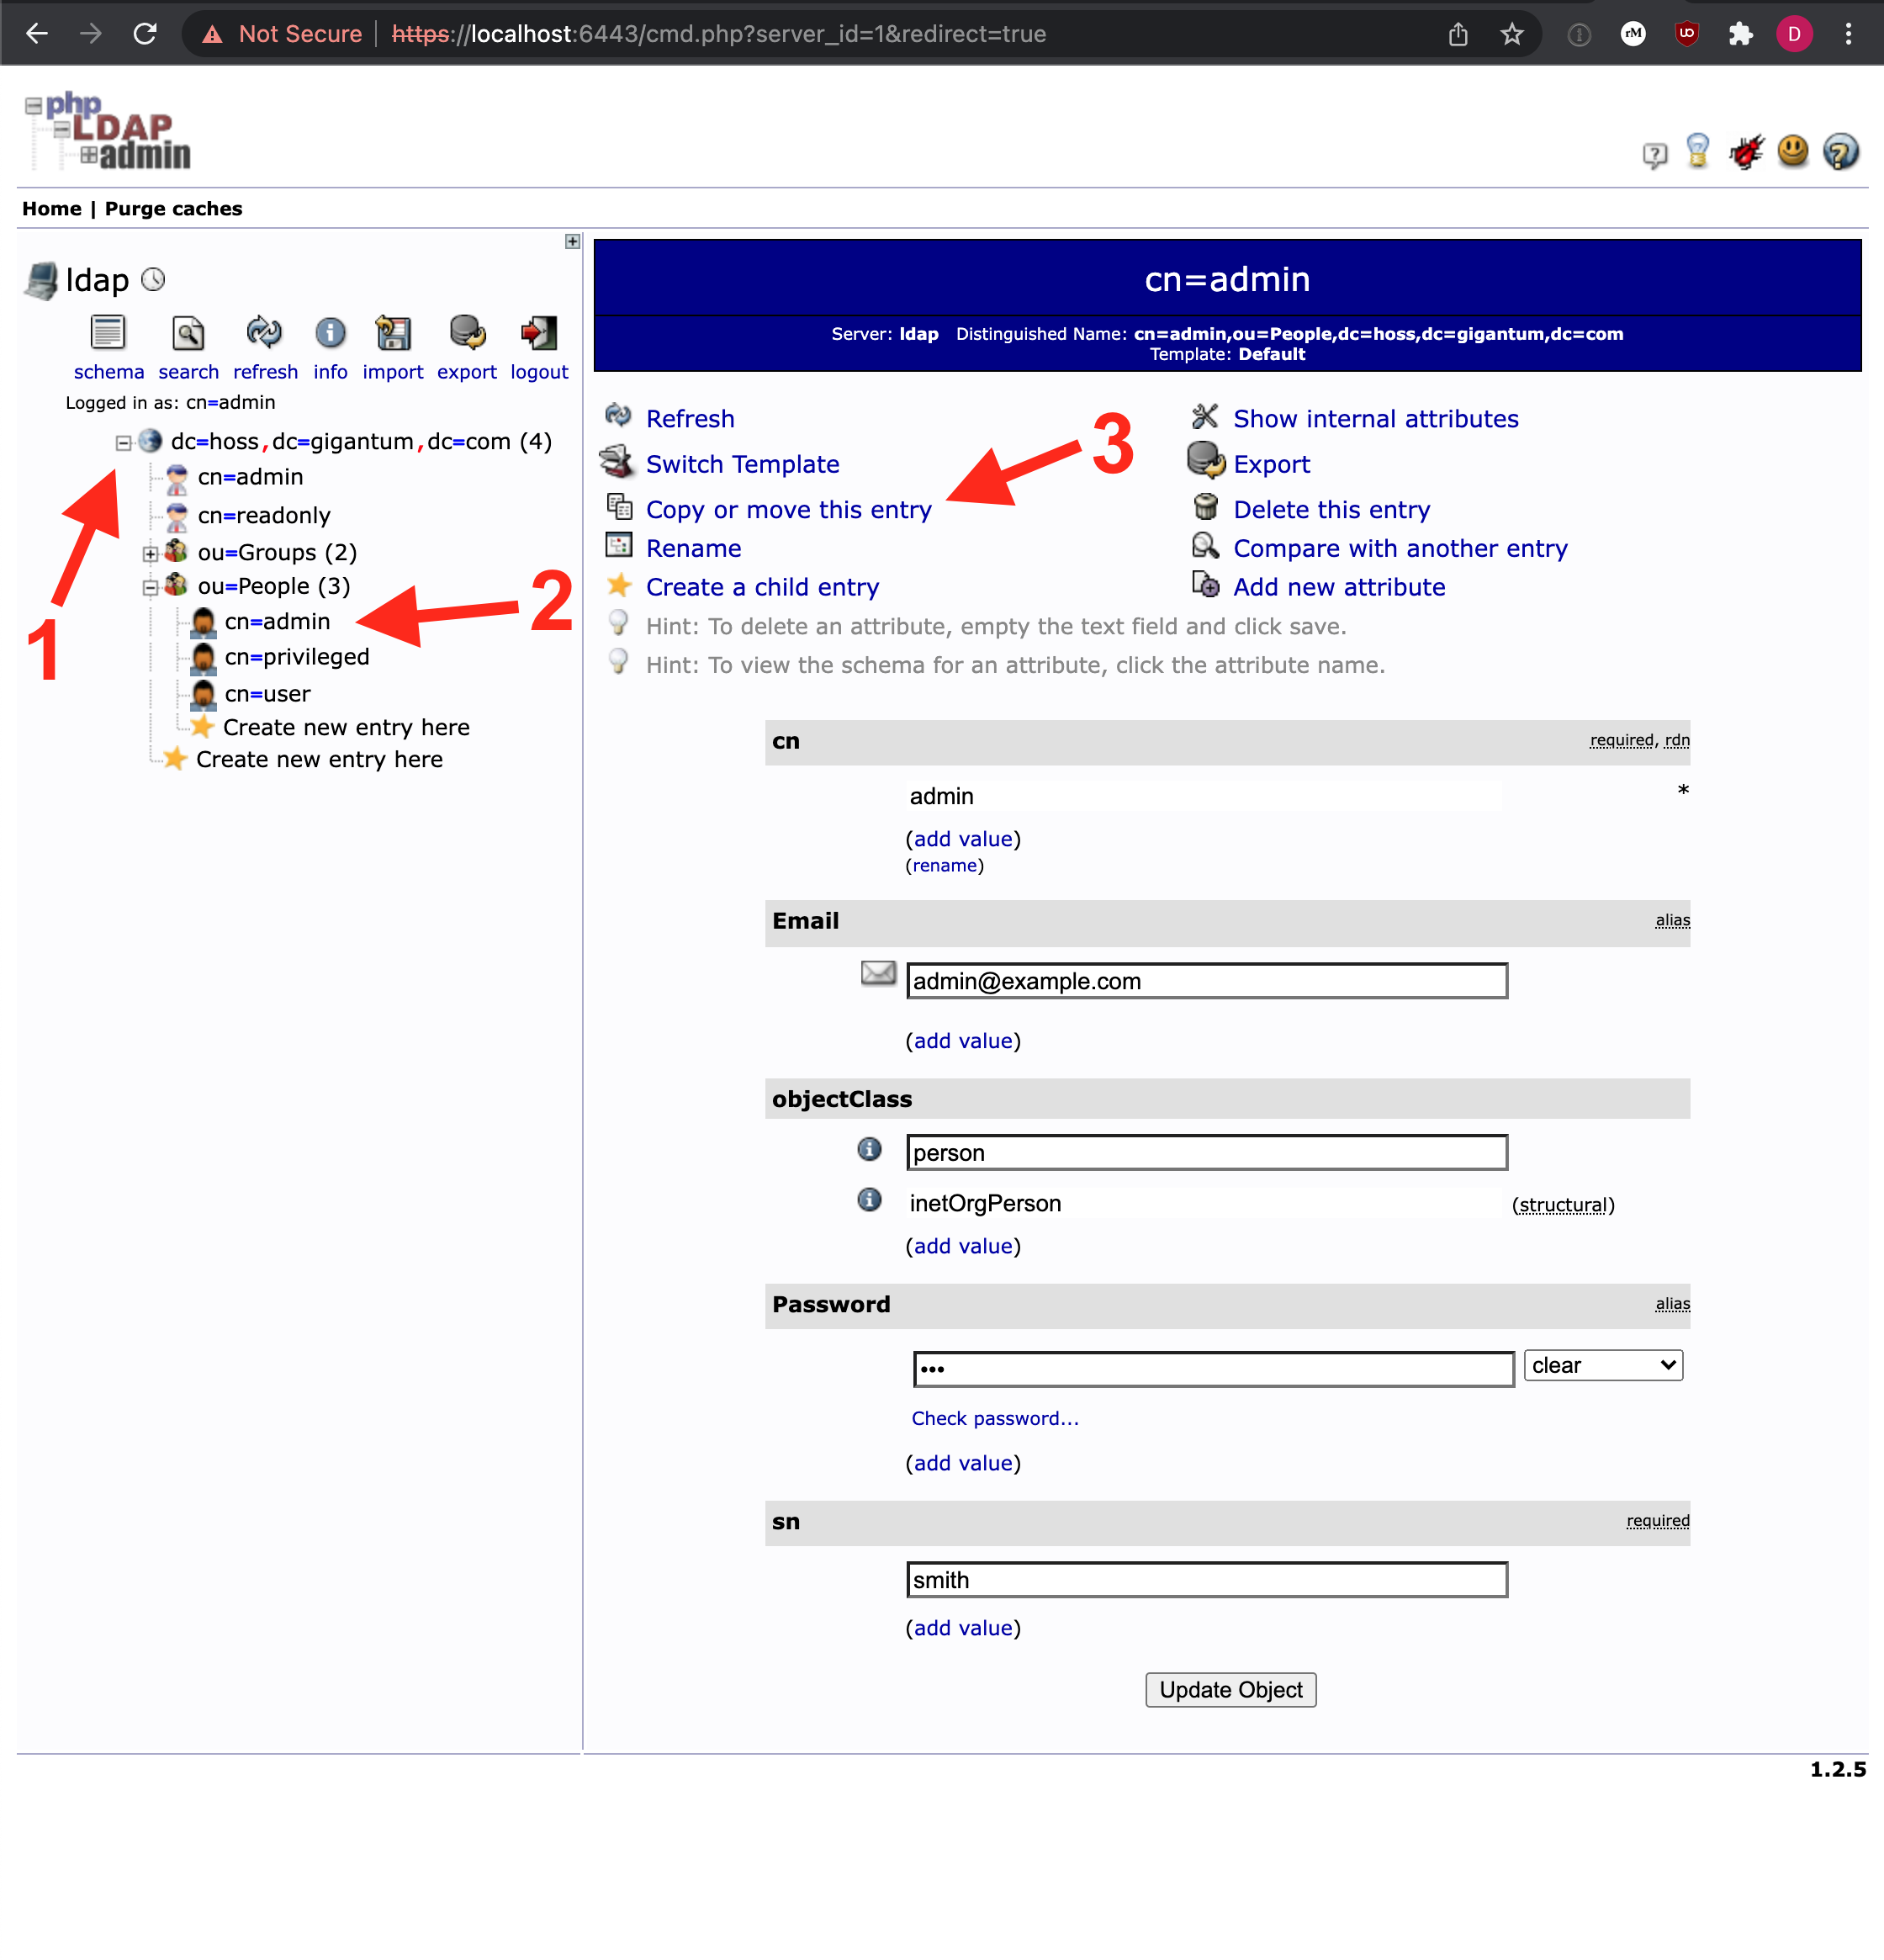
The easiest way to create a new user is to simply copy one of the test users as starting before the test users are deleted.
Expand the items on the left to reveal “ou=People”.
Select an existing user (usernames will be visible)
Select “Copy or move this entry”
On the next screen, replace
cn=<selected username>withcn=<new username>Click the “Copy” button
Modify the values
Set the email to a unique and correct value
Do not change
objectClassSet the password. You should ideally set a hashed password but could temporarily use clear. If the user changes their password after logging in for the first time via the Hoss UI it will be stored as a hashed value. For more information on how to generate a hashed password, see the “Generating Hashed Passwords” section below
snstands for surname and is typically the user’s family name/last nameClick the “Create Object” button
Click the “Commit” button
Optionally, if you wish to also add a first name/given name to your users:
Click on “Add new attribute”
Select “givenName” from the dropdown that appears
Enter a value
Click the “Update Object” button at the bottom of the page
Click “Update Object” again to confirm
Applying Roles
Roles are applied by putting users in groups. In the Hoss auth service, groups are mapped to roles when tokens are generated.
This mapping can be modified in ~/.hoss/auth/config.yaml by setting the admin_group and privileged_group items. By default
the internal LDAP server has a admins group for the admin role and a developers group for the privileged role.
To add a user to a group and effectively apply the desired role to their user account:
Expand the items on the left to reveal the contents of “ou=Groups”
Select the desired group from the left panel (e.g. “admins”)
Click the “add value” link under the “member” section to add a new row
Click the search icon to open up a window to find the desired user
Navigate to the user and select the user record (do not expand it). This will automatically fill in the record in the textbox.
Click the “Update Object” button
Click the “Update Object” button again to confirm
The updated user should log out and then back into the system to verify all changes are propagated.

Test Accounts
There are 4 test accounts automatically created if the internal LDAP server is used. These accounts are used during development and testing and should be removed when deploying a server “for real”.
username |
password |
role |
|---|---|---|
admin@example.com |
foo |
admin |
privileged@example.org |
bar |
privileged |
user@example.org |
password |
base user |
test.user@example.com |
foobar |
base user |
To remove these users, simply follow the instructions in the “Removing Users” section above.
Generating Hashed Passwords
When a user changes their password using the Hoss UI, the system will automatically store the password as a salted hash instead of clear text. The default password type in phpLDAPadmin is clear, since it doesn’t have any built-in capability to hash the input.
If you are manually creating users, it’s likely that you want to store the passwords as salted hashes instead
of clear text. The easiest way to do this is via the slappasswd utility.
Start a bare Ubuntu container
docker run -it ubuntu /bin/bash
Install the tool. You will be prompted to enter an admin password for your “LDAP directory”. This is because the
slappasswdutility gets installed as part of a larger package. You can enter any value for this password as we’ll be discarding this container when done.apt update && apt install slapd
Run the tool
slappasswdEnter the desired password twice
Copy the entire output including the
{SSHA}prefixEnter this as the password for the user, following the steps in the “Adding Users” section. Be sure to select the
sshapassword type instead of the defaultcleartype.